Importing data
This section describes how to input data into Source. Additional sub-sections focus on Source data requirements and file formats:
- Any data pre-processing or similar is discussed here;
- General requirements are available here;
- A list of all data file formats used in Source is provided here; and
- Information on the Climate data import tool.
Data input methods
Source allows you to load and manage all input data at a central location using the Data Sources Explorer. You can load data in the Explorer, edit it, and use it several times in the same model. There are two types of data input methods:
- File - when uploading time-series files for any model, the data files do not always stipulate units. Select the appropriate units, as detailed in Time series; or
- The output of a scenario - you can use the results of a previous run from a different scenario as an input to a run in the current scenario. Refer to Scenario linking for details.
When data (in the form of time series or a scenario) is added in the Data Sources Explorer, it is referred to as a data source and is available throughout Source and can be accessed in several ways:
- In a feature editor - Figure 1. Inflow Node, Additional Flow shows an inflow node with data loaded from the Data Sources Explorer;
- Using the Function Editor - reference a data source in a function or expression, such as if ($ACTIVE_DATA_SET == "Wet",5,10). Refer to Working with the Function manager for more information;
- Using the command line runner (refer to Command Line Runner Options for details on how to reference it); or
- Output of the Climate Data Import tool - refer to Climate data import tool.
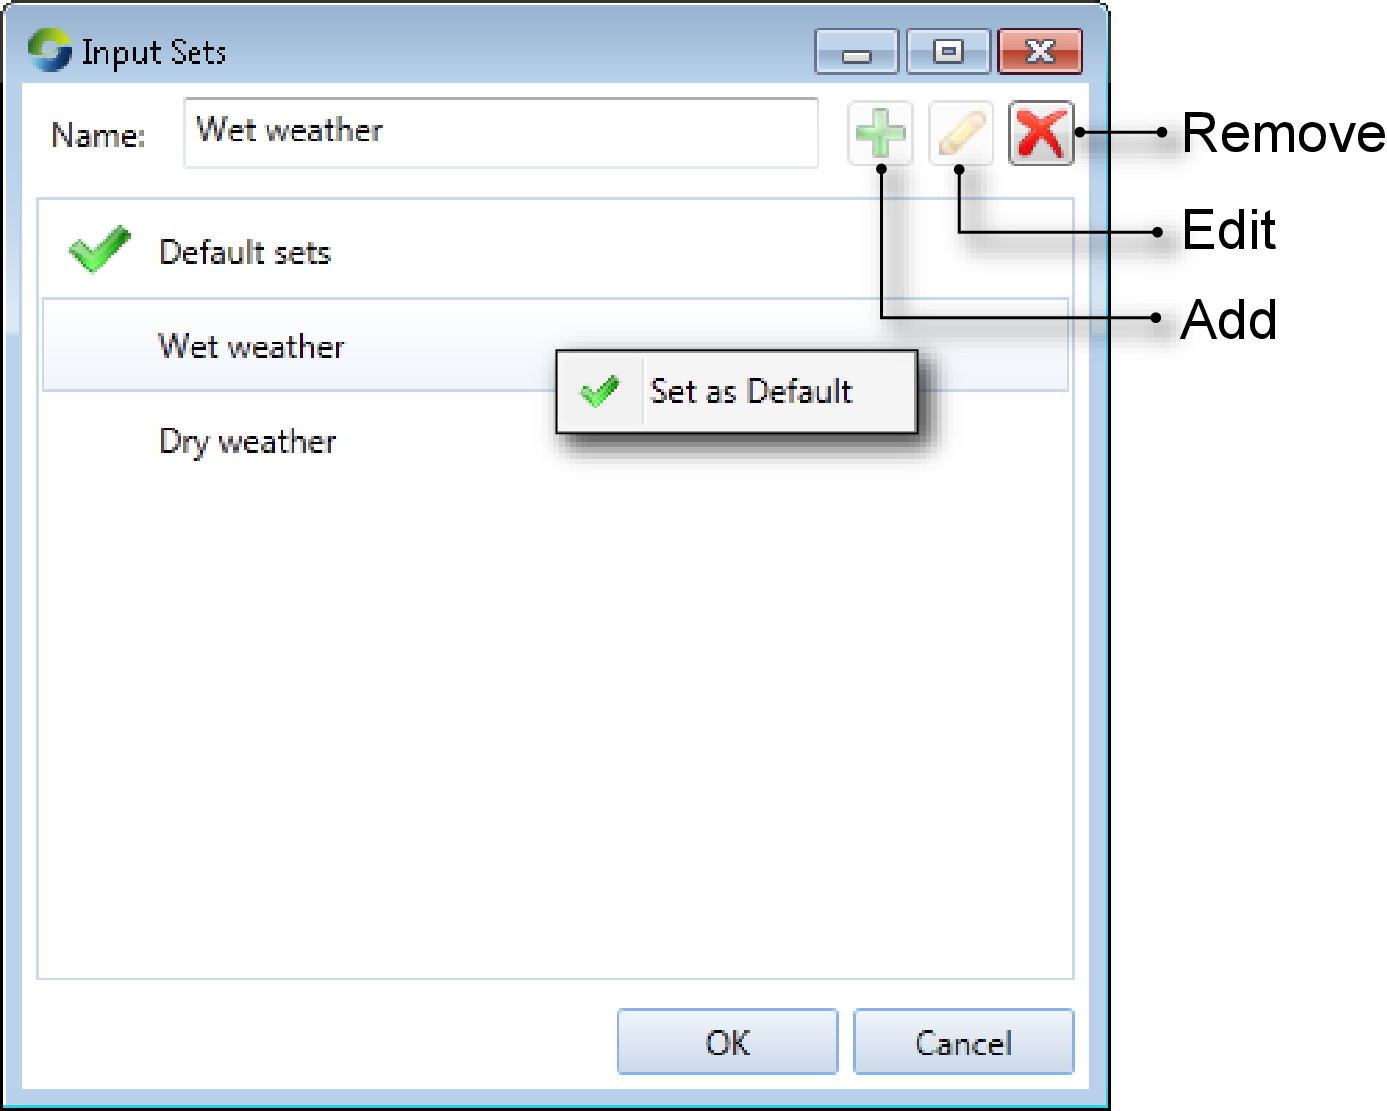
Input sets
In Source, an input set consists of a group of data sources that can be used to represent a weather feature, for example. You can switch between different input sets to compare the effects on a model. For example, you can have one input for natural conditions, another for wet conditions and a third set for dry conditions. Input sets allow you to easily keep the model structure, while changing the input data.
Choose to open the Input Sets dialog (Figure 1). You can manage them as follows:
- To add an input set, enter its name in the Name field and click Add;
- To change the name of an input set, choose the input set from the list, then enter the new name in the Name field and click Edit; or
- To remove an input set, choose it from the list, then click Remove.
Figure 1. Input Sets
About "Reload on Run"
In many cases, there is a Reload on Run checkbox associated with the controls for loading data into Source. Regardless of whether the data source is a file or another scenario, it is loaded into an internal store.
If Reload on Run is turned off, Source will use a copy of the data present in its internal store until you either:
- Turn on Reload on Run; or
- Click Load and designate a data source (either the same file or a new one).
If Reload on Run is enabled, Source will reload its internal store from the original source each time you click the Begin Analysis (Run) button. In other words, if Reload on Run is turned off and you change the source file, Source will continue to use the data in its internal store.
Conversely, if Reload on Run is turned on and you change the source data, Source will update its internal store each time you run the model. The corollary is that you must ensure that your data sources are accessible for every run.
Loading data
You can associate data with an input set in the Data Sources Explorer or in a node or link’s feature editor. Figure 2 shows features of the Explorer containing all data sources available in the scenario, both from time series files and scenarios. Additionally, it shows the nodes that each data source is associated with.
Figure 2. Data Sources Explorer
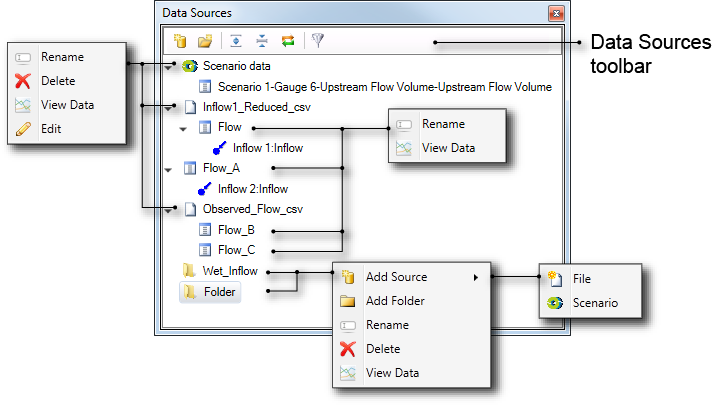
The following contextual menu options allow you to :
- Delete - deletes the selected file/folder;
- Edit - Allows you to change the selected data source. This opens the data source dialog (shown in Figures 3 or 4) where you can change various features of the data source (as described below);
- Rename - Allows you to change the name of the input data file/folder; and
- View Data - Opens the time series in the charting tool.
Time series
Open Figure 3 as follows. Either:
- Click the New Data Source... button on the Data Sources toolbar and choose File Data Source from the drop down menu; or
- Click File on the Data Sources toolbar. Then right click on the Folder icon and choose Add Source File from the contextual menu.
Figure 3. New Data Source, Time series
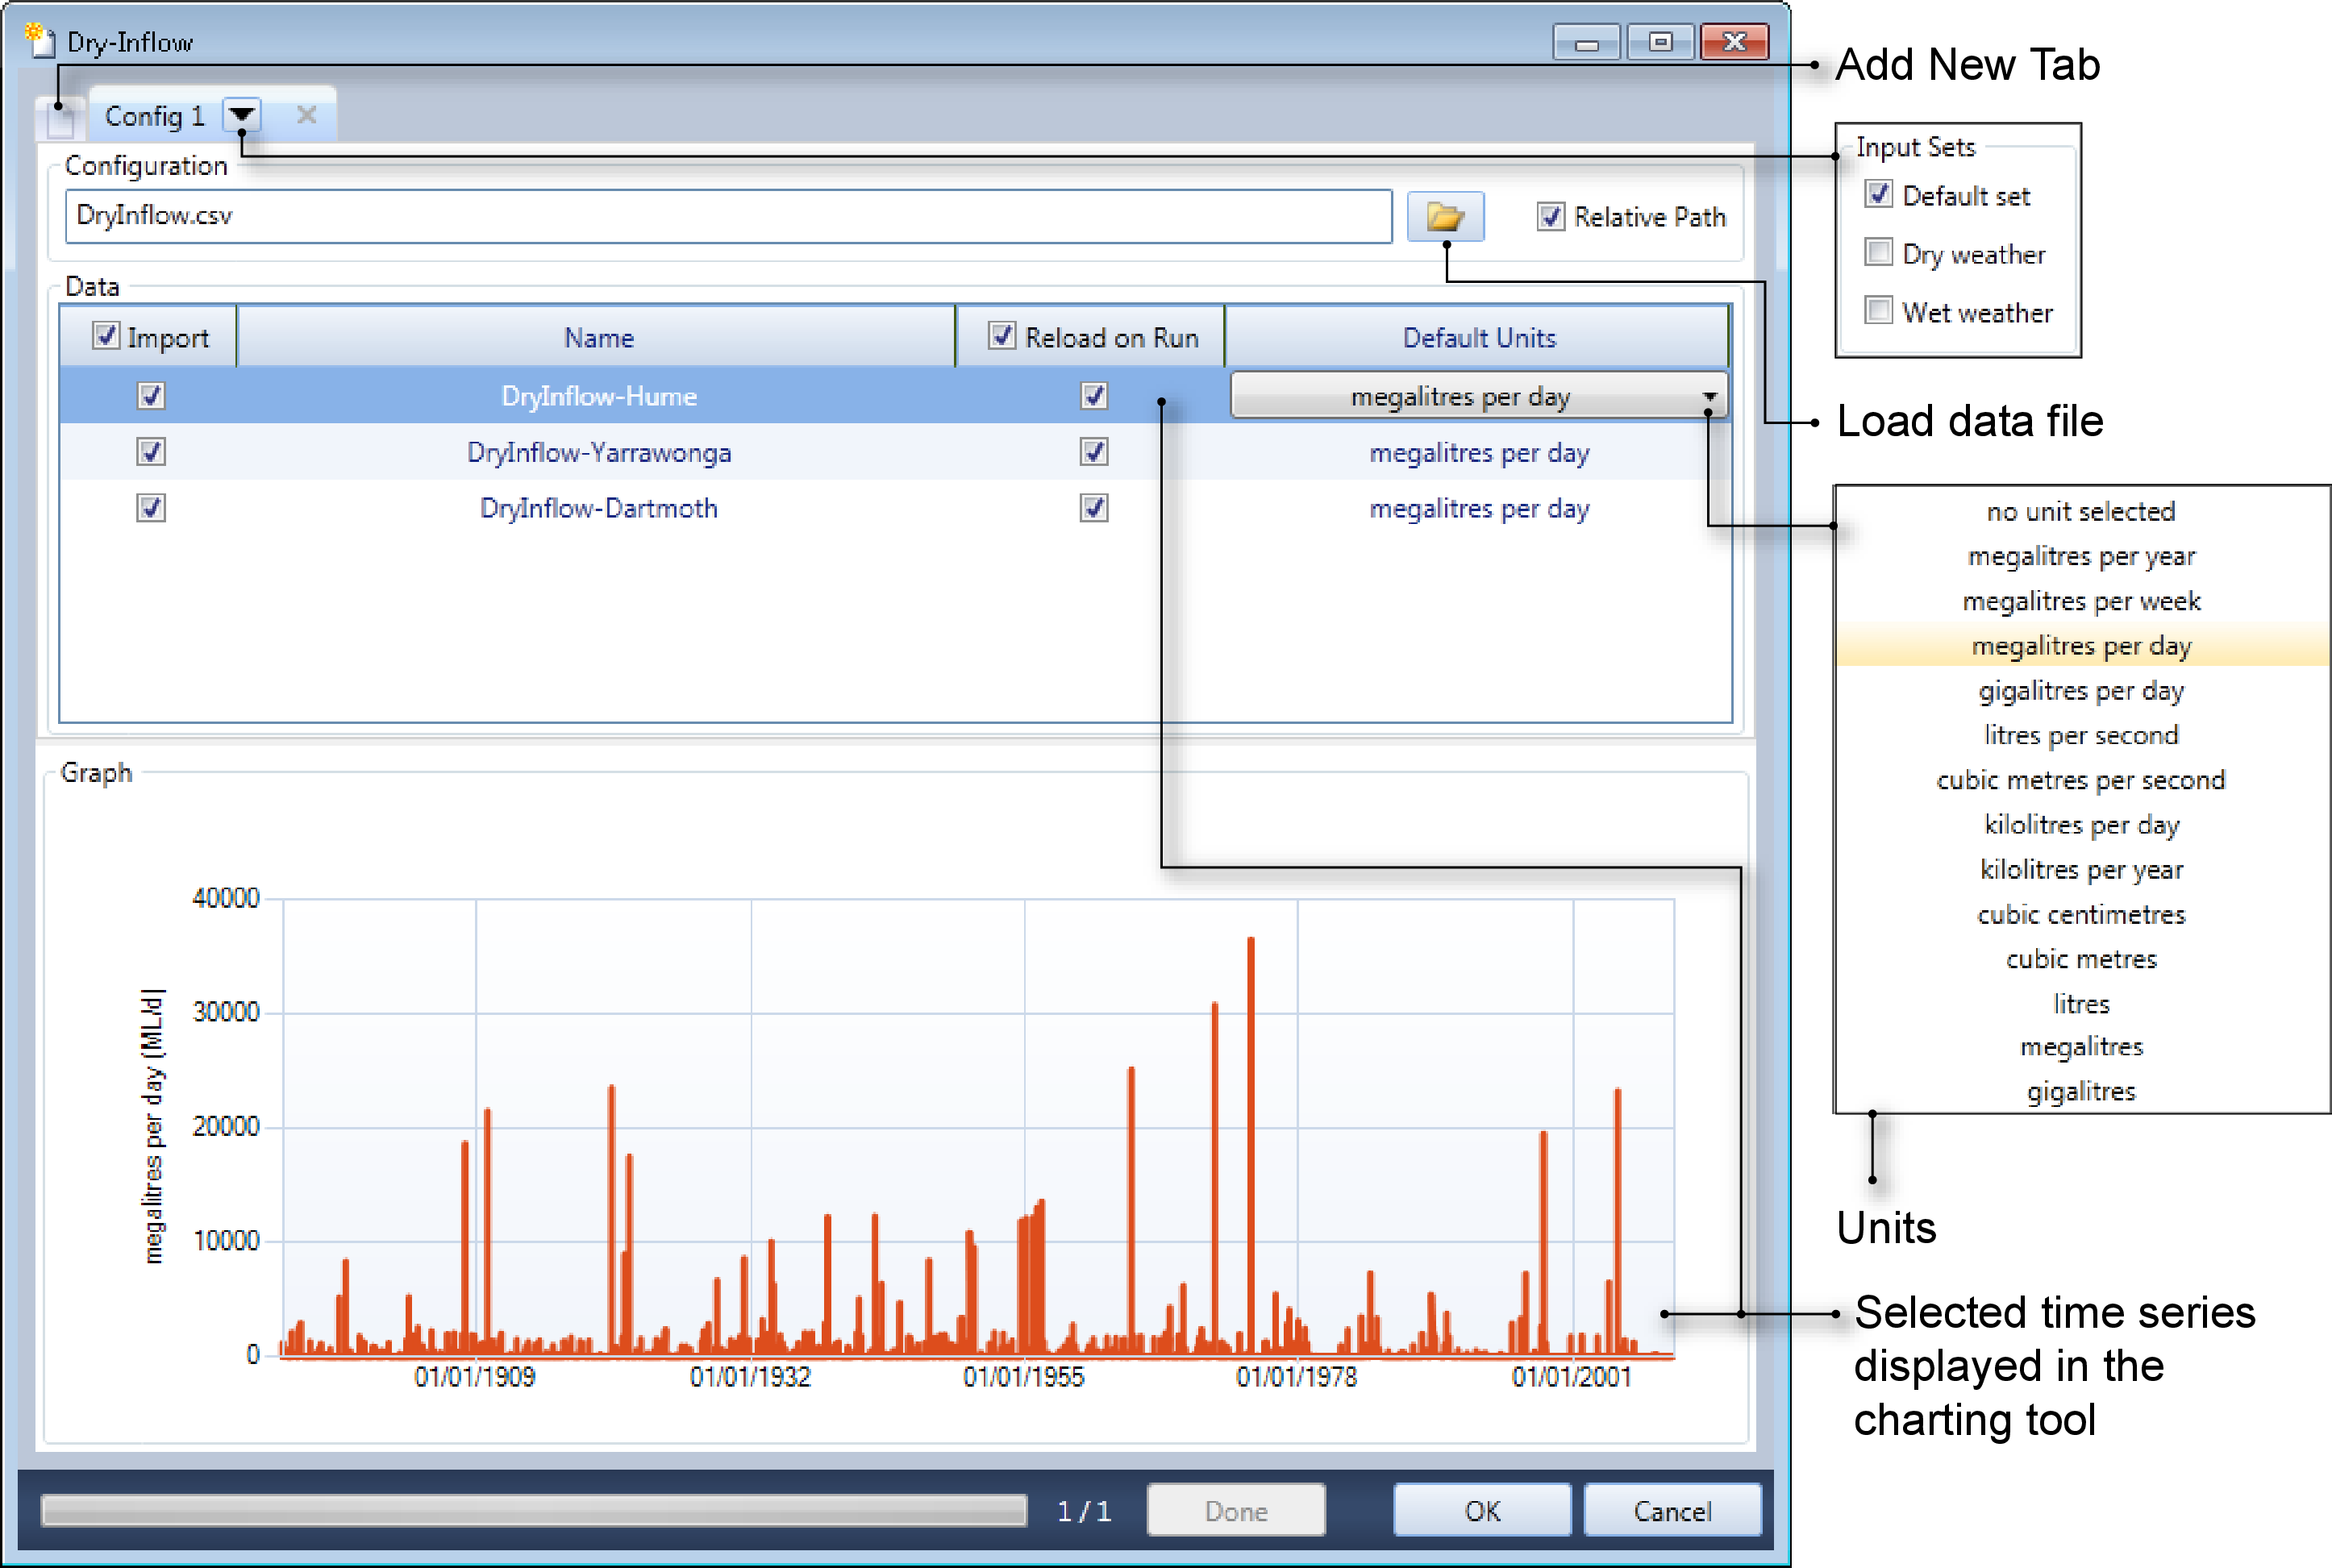
To load a time time series:
- Click the Load data file icon and load the required time series;
- Each column in the time series represents a row in the Data table. Click on the Default Units cell and choose the appropriate units from the drop down menu;
- You can also choose which input set the time series will be associated with by clicking on the arrow for the Config 1 tab; and
- If you enable the Relative Path check box, the paths displayed is the location of the time-series file relative to the project. Note that the project must have been saved prior to this.
To disconnect a time series from a node or link, open the required feature editor. In the Data Sources Explorer, click on the Group that contains the file. The time series will be removed from the node. This can be confirmed by checking the Data Sources Explorer in the main screen.
Scenario linking
To link to the output of a scenario, click the Scenario Data Source... button on the Data Sources toolbar and choose Scenario Data Source from the drop down menu or click File on the Data Sources toolbar. Then right click on the Folder icon and choose from the contextual menu. This opens the Scenario data dialog (shown in Figure 4). Note that the name of this dialog corresponds to the Data Sources Explorer (Figure 2)
Figure 4. New Data Source, Scenario Linking
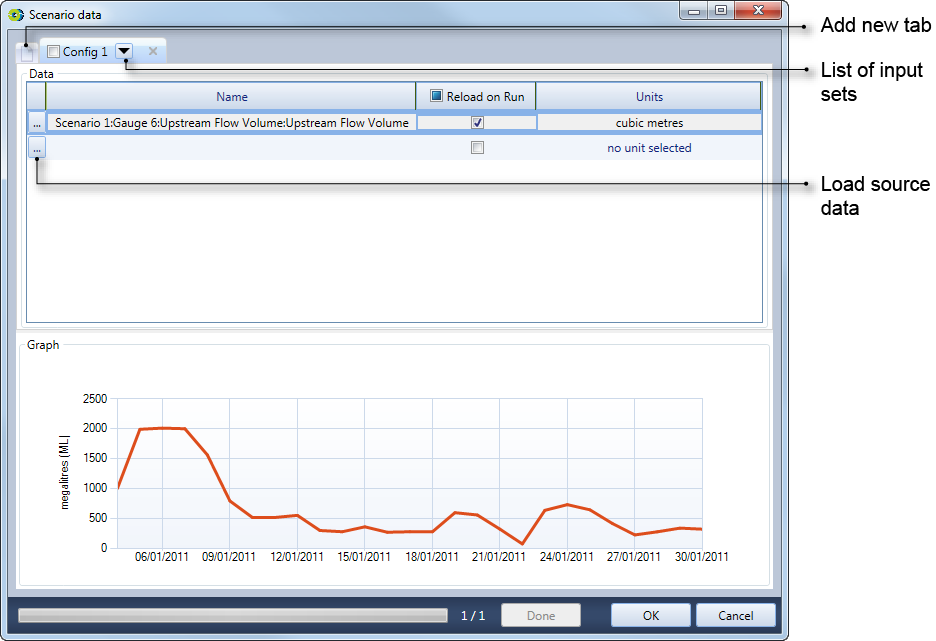
To add a scenario as a data source:
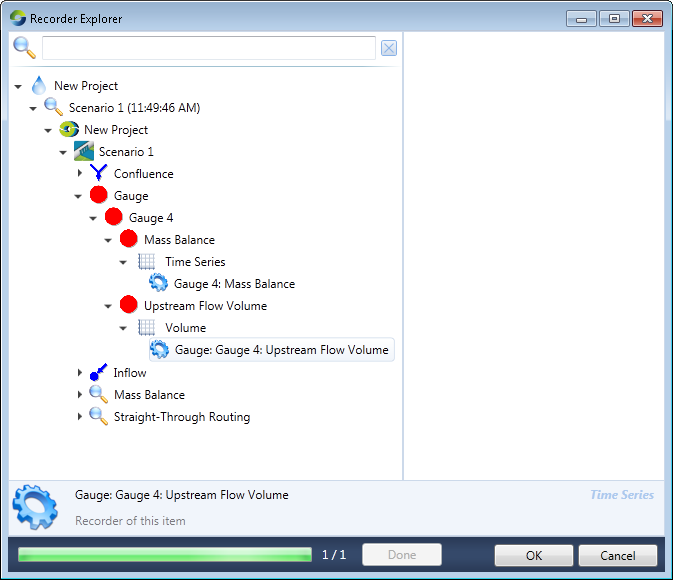
- Click on the ellipsis button on the first column of the Data table (Load source data), which opens the Recorder Explorer (Figure 5);
- This dialog lists the attributes that have been recorded for all the nodes and links in the scenario. Choose the attribute that you wish to use as input data to another scenario. In Figure 5, this data is the Upstream Flow Volume attribute;
- Click OK to close the Recorder Explorer;
- The New Group dialog now shows the Upstream Flow Volume in the Name column. If required, enable the Reload on Run checkbox;
- The units are set automatically from the recorder chosen;
- Just as with time series, you can the input set that is associated with this data source; and
- To load another scenario data source, repeat this process.
Figure 5. New Data Source, Recorder Explorer
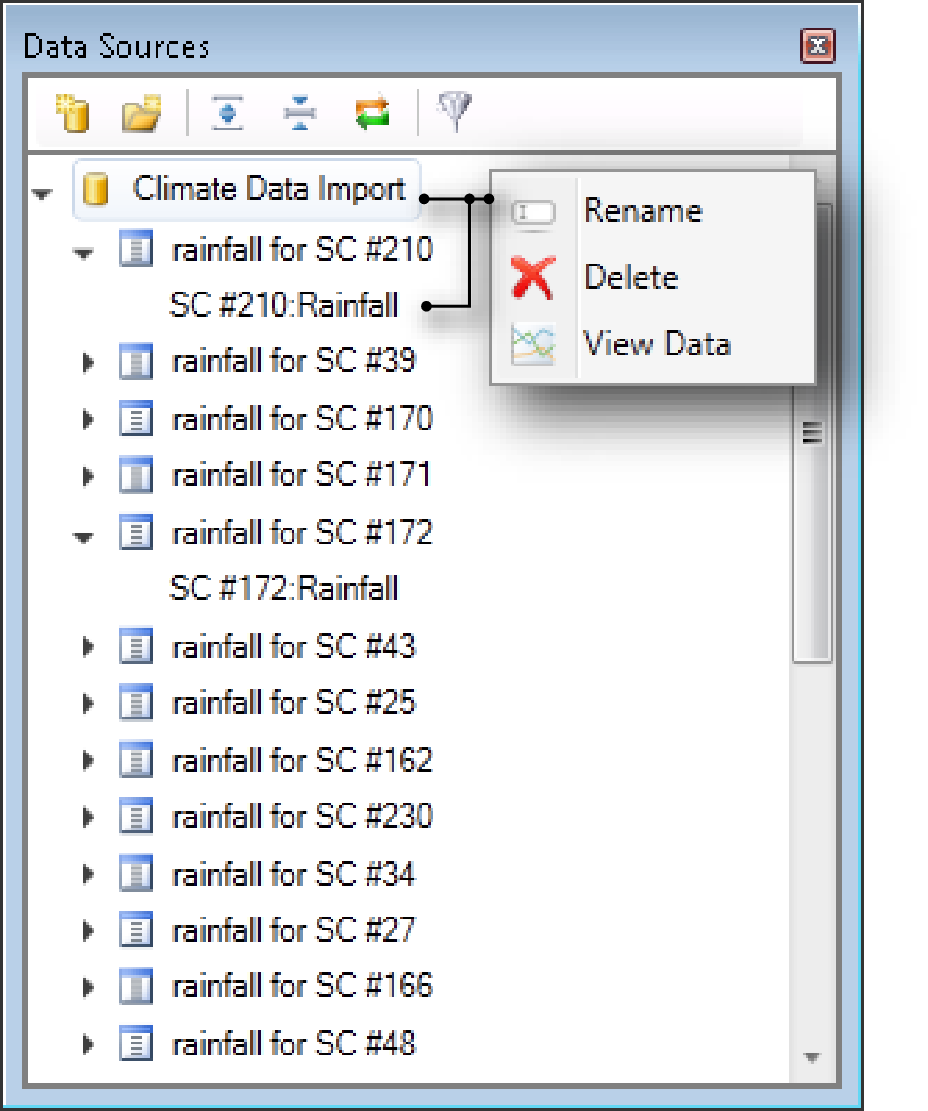
Data from Import tool
Refer to Climate data import tool for generating data. Once the tool has imported data, it can be used as a data source. Figure 6 shows the Data Sources Explorer with data generated by the tool, which can now be used as a time series.
Figure 6. Data Source Explorer, Climate Data Import