Note: This is documentation for version 4.11 of Source. For a different version of Source, select the relevant space by using the Spaces menu in the toolbar above
Configuring Scenarios
To run a scenario, do the following:
- Select the recorded parameters (model outputs) of interest in the Project Hierarchy and Parameter pane. See below.
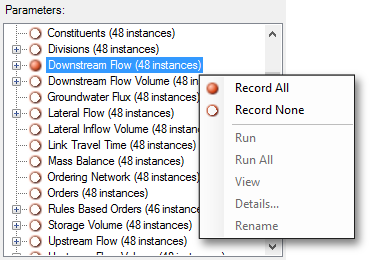
- Some model outputs are selected by default; these can be turned off by right-clicking on the Scenario's name and selecting Record None.
- Some model outputs are selected by default; these can be turned off by right-clicking on the Scenario's name and selecting Record None.
- Click Select Analysis Type on the Simulation toolbar to set the appropriate type of analysis. Depending on the scenario, Source offers several options for analysing your model data, including:
- Flow calibration analysis, which calibrates a set of rainfall-runoff and flow routing model parameter values so that output from the model is representative of an observed data set;
- Run w/Warm Up, which seeds the model with the available historical data and prepares for forecasting. This is enabled in River Operations scenarios only;
- Single analysis, which simulates the river performance for a single set of conditions (as opposed to an iterative analysis which considers several possible outcomes); or
- Stochastic analysis, which is used to generate flow replicates from stochastically generated rainfall inputs when dealing with stochastic climate data. See also Incorporating uncertainty into climate variability.
- Click Configure on the Simulation toolbar to select the required time frame for the scenario to run. The resulting window depends on the type of analysis you chose in the previous step.
If you chose: - Flow Calibration analysis, the Calibration Wizard opens. Refer to Calibration Wizard for catchments;
- Run w/Warm Up, the Run w/Warm Up window opens when you run an Operations scenario;
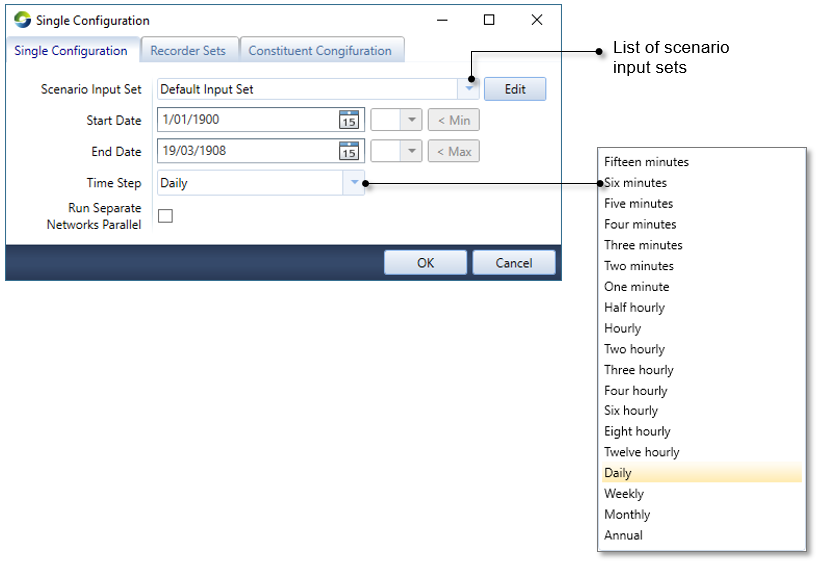
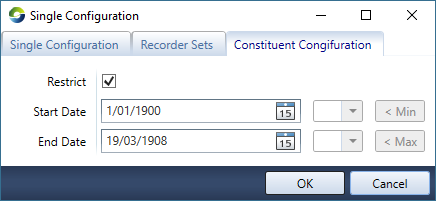
- Single analysis, the Single Analysis window opens (Figure 1). If constituents have been configured in the scenario, the Constituents tab will be enabled where you can choose to run constituents over a selected date range or over the entire time range (using the Restrict checkbox shown in Figure 2)
- Stochastic analysis, the Stochastic Analysis Tool opens.
You can only configure a run time frame that is supported by the time spans in the time series associated with your scenario. A lowest-common-denominator approach is used. For example, if your project contains two time series where the first spans the period 1/1/1900 through 31/12/1990, and the second, the period 1/1/1960 through 21/12/2010, the available simulation time frame will be 1/1/1960 through 31/12/1990.
- Click Run on the Simulation toolbar to start the simulation run.
Figure 1. Configure single analysis
Figure 2. Running constituents
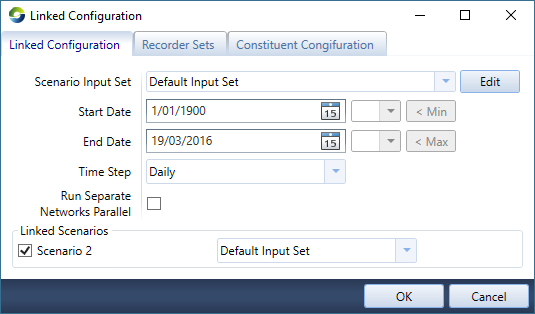
Figure 3 shows the dialog when you configure a linked scenario (using a Connecting Models).
Figure 3. Running linked scenarios
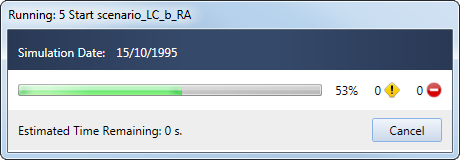
A progress bar indicates running times during a scenario run (Figure 4).
Figure 4. Running scenario (progress bar)
Running configurations
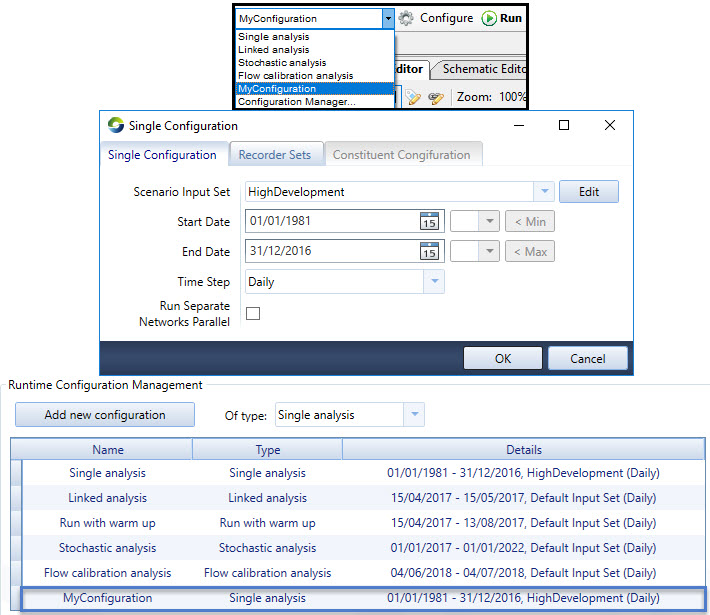
A scenario can be customised to run using a combination of specifically assigned dates and Scenario Input Sets. This option is accessed through the Configuration Manager (Figure 5) or directly under Edit » Scenario Options. In Figure 6, the Single Analysis configuration is set to run for the dates 01/01/1981 - 31/12/2016 and will use values assigned through the HighDevelopment input set. A new configuration can be added with a customised name. In the Of type dropdown menu, first select the type of analysis to be run, e.g. 'Single analysis'. Then click the Add new configuration button. A new row appears at the bottom of the existing list of configurations. By default it is called Custom 1. To rename the configuration, double-click on the name and type in a chosen name. This new configuration option will appear in the configuration dropdown menu on the main Source toolbar. The Scenario Input Set to run and selected dates are set from the main configuration screen. These steps are illustrated in Figure 7.
To delete a configuration, select the relevant row and press the Delete button on the keyboard.
Figure 5. Accessing the Configuration Manager
Figure 6. Specifying run configuration settings
Figure 7. Customising run configuration settings
Model run times
Generally, the larger or more complex the model, the longer it will take to run. There are several user-configurable options in Source that you can use to increase performance (ie. reduce scenario run times) by ensuring only necessary functions and features are enabled during a model run. For example, you can reduce the number of recorded parameters (see below), or reduce the modelling period by choosing appropriate start and end dates when configuring your model (Figure 1). Other options include running various model components in parallel, these options can be enabled when configuring the model (Figure 1) and from within the Scenario Options dialog (Edit » Scenario Options). See Improving Performance for more information.
Recorded Parameters
Model results are only output from a model run for the Parameters that have been selected as recorded in the Parameter window (Figure 8). Custom Recorder Sets can be saved, or exported from a model and provide a quick method for changing the activated recorders within the model.
Figure 8. Recorded Parameters
Recorder Sets
You can now easily switch between groups of recorders by using recorder sets. Similar to scenario input sets, they can be created from existing recorder configurations, specified manually using the text editor, or from a file. To access configuration, select Edit >> Recorder Sets.
Configuration Options
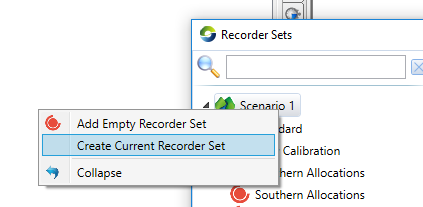
The quickest way to construct a Recorder Set is to enable recorders manually in the project hierarchy and parameter pane, and then select Edit >> Recorder Sets, right click on the scenario name and select Create Current Recorder Set (Figure 9), this adds all the selected reorders from the project to the Recorder Set editor pane. This Recorder Set can then be edited, saved or applied immediately to the project.
Figure 9. Adding a Recorder Set
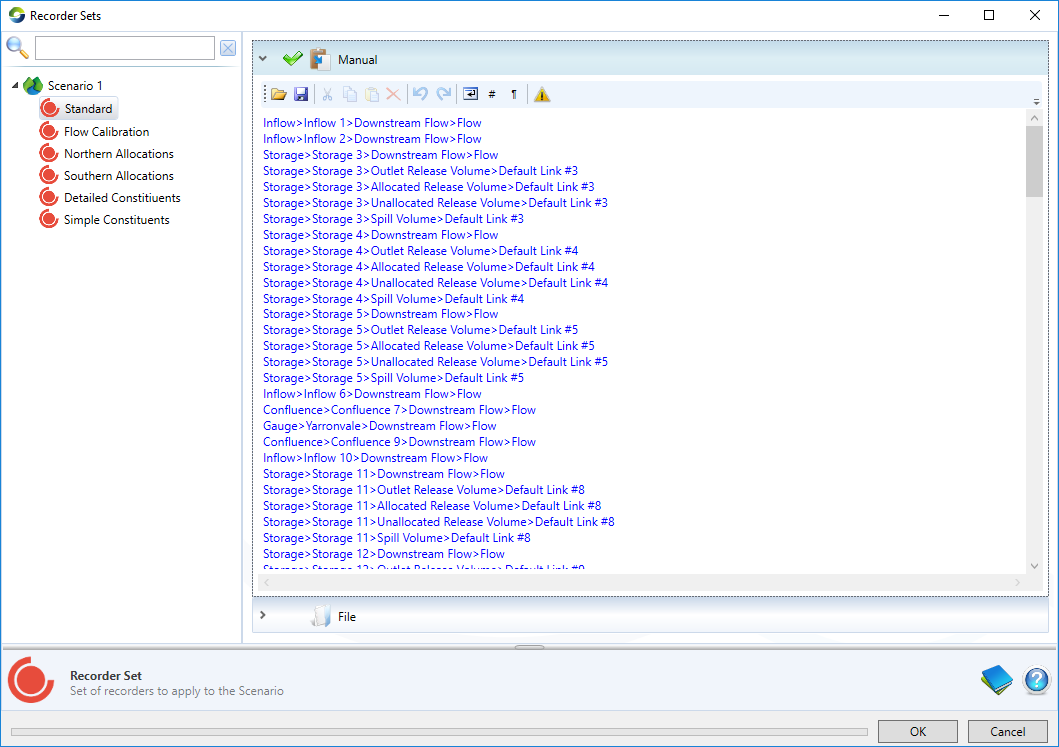
Recorder Sets can be added manually using the inbuilt text editor. Select Edit >> Recorder Sets, right click on the desired scenario and select Add Empty Recorder Set. Text configuration can also be read directly from an external text file with reload on run enabled, by selecting the File instead of the Manual configuration option (Figure 10).
Figure 10. Recorder Set added to Recorder Set Editor
Using Wildcards
You can also define recorder sets with wildcards. e.g. Inflow>*>Downstream Flow>Downstream Flow will record the Downstream Flow for every node of type "Inflow". A recorder set must have at least 4 sections (separated by a '>' character).
e.g: To record every inflow recorder, you must use Inflow > * > * > *
To record every downstream flow recorder, you must use * > * > * > Downstream Flow
When Running
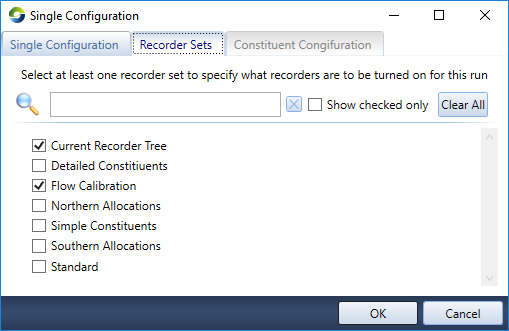
When configuring the model run, multiple recorder sets can be enabled and recorded for the model run (Figure 11).
